
It was my Mom's birthday last week, and so I decided to throw a dinner party for her. I should also mention that my brother Dave moved out in early January, so this doubled as a celebration in honor having a house of my own (his old bedroom is my new dining room!). Plus it's just fun to cook elaborate meals for your loved ones in the winter time. Gardening and other outdoor pursuits leave me little time for such things in the summer.
The one catch to this dinner party was that Saturday night was the only night that would work for all my guests. My "weekend" is Sunday and Monday, so I had to work till 4pm and then prepare dinner on Saturday. The planned menu would take a lot more than 2 hours to prepare, so a lot of prep was necessary.
The planned menu consisted of: Olives Stuffed with Sausage and Deep-Fried, Eggs Fairy Style (kind of like fancy deviled eggs), A Jerusalem Artichoke and Apple Salad, Marina di Chioggia Gocchi with Sage Butter, Roast Pork with Apples, and Strawberry Shortcake (made with frozen strawberries preserved from the summer harvest).
Be prepared for lot of pictures in this post! I'll try to breeze through them quickly. If you're interested in recipes, please let me know and I'll get them to you.
 Thursday night was my first night of prep. I did all my shopping after work and prepared a few things. The first was to make breadcrumbs for the stuffed olives. I chopped this sourdough baguette in half, cut it into chunks, and processed it in the food processor. This method worked relatively well. I put the finished crumbs in a open bag on the counter hoping that they would dry out sufficiently before Saturday night.
 This vanilla bean was designated for the strawberry shortcake. I wanted the vanilla flavor to be strong, so I decided to flavor my sugar on top of adding the vanilla bean straight to the dessert.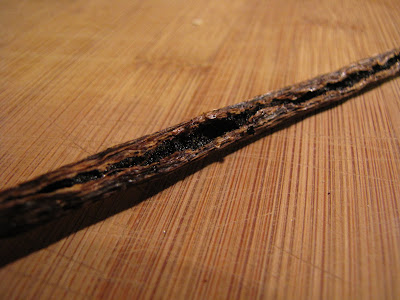
I opened it up carefully with a paring knife. The black gooey vanilla substance oozed out. Mmmmmm.... This is one ingredient that's worth shipping over long distances!
 Vanilla goodness. (no comments about my weirdly shaped thumb please!). I cut the opened vanilla bean in half and put it in with the sugar to "marinate" for a few days.
 Fast forward to Friday night - the night before the dinner. My chickens haven't been laying much at all recently, but I had 9 eggs on hand. I picked these 8 for the eggs "fairy style".
 I had a hunch that Julia Child had the best advise for hard boiling eggs, so I consulted one of her cookbooks. She warned that fresh eggs can be very hard to peel, but if you salt your water, pin prick in the blunt end of your eggs, and chill them well after cooking, your chances of success are higher.
  Per Julia's advise, instead of boiling the eggs I coddled them. This means you put them in cold water and gradually heat them to boiling. When they reach the boiling point, you take them off the heat, put a lid on them, and wait for 17 minutes (not 16, not 18, but 17 minutes). I did all this and then put them in cold water and into the fridge to chill.
 Meanwhile, I prepared the sausage stuffing for the olives. These are Andoullie sausage from Willow Creek Farm. I know Andouille isn't exactly the best sausage for an Italian recipe, but they were free at work (they had slightly damaged packaging and so couldn't be sold). Work with what you've got!
 I took them out of their casings and cooked the sausage with some of my homemade tomato paste (cooked and frozen in August), and seasoned it with a little cinnamon, nutmeg, and black pepper. Once it had cooled, I added Parmesan cheese and put it in the fridge to wait for the olive stuffing the next day.
 I also cooked the shortcakes on Friday night. The simplest recipe from The Joy of Cooking always works for me. Flour, butter, heavy cream, and baking powder. I brushed some melted butter and a little of the vanilla sugar on top.
 Just perfect!
 The eggs, on the other hand, were not perfect. I tried my hardest to peel them, but this is what I ended up with. Something to do with fresh eggs being more acidic than older ones, and acid apparently makes them harder to peel.
 The idea of eggs "fairy style" quickly went out the window. That recipe is all about presentation, and these eggs just weren't going to cut it. I decided instead to make an egg dip.
 I pressed the hard boiled eggs through a sieve......
 .... and ended up with this nice egg puree. It was fluffy and pretty - like really dainty scrambled eggs.
 I added some frozen basil from the summer (the basil log in the background is great! I've been cutting chunks off and using it all winter).
 I also added some roasted cherry tomatoes that I had frozen from the summer. Tomatoes and basil in February? Freezers are awesome! I mixed in some apple cider vinegar, salt and pepper, tasted it, and called it good.
Next, I got to work on the strawberry sauce for the shortcake. Being a winter strawberry shortcake made with frozen strawberries, I decided it would be best to make a berry sauce and serve it warm. I added the vanilla beans, some of the sugar, and a squeeze of lemon juice and started them simmering over low heat.
 While they were cooking I started working on the pork. This beautiful roast is from Willow Creek Farm (Their pork is so good I'm beginning to think that I'll never be able to eat pork from anywhere else!)
  I rubbed it with butter, dried sage, salt and pepper and put it in the fridge to "marinate" overnight.
 These Jonared apples from Ella Orchard were to accompany the pork.
 I had seen recipes that say to marinate apples for a pork roast in white wine before cooking. I changed it up a little by marinating them in some home-made hard cider that had been open for a while and had become flat. These also went in the fridge overnight.
 Finally, we're to Saturday night! Right when I got home at 4pm I placed the apples, cider, and pork in a roasting pan and got it in the oven. Dave and Erica came over to help before dinner. Erica set the table, and then I assigned them the olive stuffing and frying duties. They experimented with different ways of stuffing, and finally settled on the one on the top of this picture - slitting the olive open and stuffing rather than trying to get the stuffing in the hole.
 While they did that, I cut up some local veggies to go with my egg dip. Yellow carrots, beauty heart (aka watermelon) radishes, and Jerusalem artichokes. The dip looked for all the world like hummus, but I think it tasted better.
 The olives required three dippings - first flour, then egg, then breadcrumbs - before frying. Dave and Erica tried to use this egg (collected from the coop just minutes before), but as you can see, it was frozen. I've never seen such a thing! I've been collecting them in freezing temperatures all winter, but I've kept them in the fridge long enough to thaw out. I wonder if you can freeze eggs to preserve them..... hmmmmmm.......
 Here are the finished fried olives. A lot of work, but my were they good!
 I had just enough sage on the plant that I've been keeping inside this winter for the sage butter to go with the gnocchi. While everyone was enjoying the appetizers I chopped up the sage, added it to melted butter, and cooked it slowly for a few minutes.
 I had made the gnocchi the weekend before, so all I had to do was heat up water to boiling, dump the gnocchi in, and wait for it to float. I drained it and tossed it with the sage butter. Easy peasy!
 The roast wasn't all that appetizing right out of the oven......
 .... it looked much better after slicing. Delicious in fact!
 Here's my plate! I completely forgot to take pictures of the salad making - I guess it got forgotten in the rush to get everything together. It consisted of apples, Jerusalem artichokes, carrots, lemon and blood orange juice, salt, and a touch of thyme (mostly to add a little green color). It added just the right crunch to offset the gnocchi and the pork.
 Erica, my two brothers and Mom, getting ready to eat. Dave said it felt a little weird to be eating in his old bedroom, but he got over it.
 Here's the whole crew. It was tight, but we made it work.
Don't forget dessert! Strawberry sauce with plenty of vanilla, shortcake, and whipped cream. A wonderful end to a wonderful winter meal. Strawberry shortcake was especially perfect for Mom's birthday since she and I picked these strawberries together last summer. We usually have strawberry shortcake for my birthday in June - what a treat to have it for her's in January!
I'm not going to post recipes here, but again, if you want any, please let me know and I'll post them!
share on: Facebook


 Probably not many people following this blog will remember


 Posts
Posts


